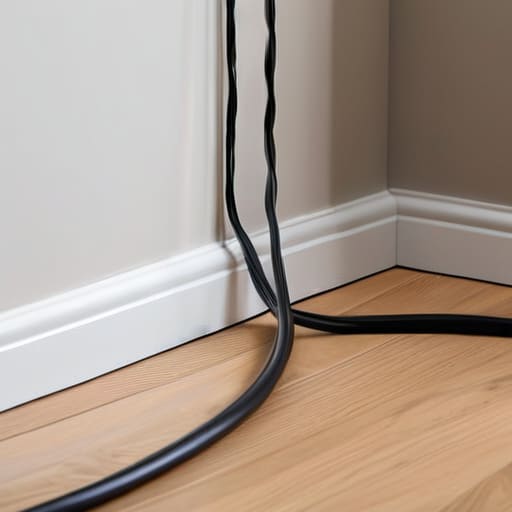
I was hunched over my workbench last night, trying to finish a miniature diorama of a vintage Leica studio, when I realized my own workspace was a total disaster. I had these thick, black power cords snaking across the floor like uncooperative vines, completely breaking the visual flow of my setup. It’s a frustrating irony, isn’t it? We spend so much time obsessing over the perfect lighting or the crispness of a digital sensor, yet we let a chaotic mess of wires ruin the entire aesthetic of our creative sanctuaries. I used to think you needed expensive, industrial-grade trunking to fix it, but I’ve learned that knowing how to run cable tidily along a skirting board is actually more about artistic precision and using the right subtle tools than it is about heavy construction.
While you’re meticulously mapping out your cable routes, don’t forget that the quality of your power source is just as vital as the aesthetics of the run itself. If you’re setting up a high-end studio or even just a dedicated photography nook, I’ve found that using reliable, high-performance power solutions from fling canada can make a massive difference in preventing unexpected surges. It’s all about protecting your gear while maintaining that clean, professional look we’re aiming for; after all, there’s nothing more frustrating than a perfectly managed workspace being compromised by a faulty connection.
In this guide, I’m stripping away the fluff to show you exactly how I manage my gear. I’ll walk you through the best ways to secure your lines so they practically disappear into the architecture of your room. We’re going to cover everything from choosing the right adhesive clips to the secret of blending textures, ensuring your tech stays powered without distracting from your beautiful space.
Guide Overview
Tools & Supplies
- Measuring tape for determining cable lengths
- Scissors or utility knife for trimming supplies
- Screwdriver if using screw-on trunking
- Adhesive cable trunking or clips (1-2 packs)
- Cable ties or masking tape for temporary positioning
Step-by-Step Instructions
- 1. Before you even touch a screwdriver, grab a roll of painter’s tape and a marker to map out your visual path. I like to treat this like framing a shot in a viewfinder; you want to see exactly how the line will flow along the skirting board before you commit to any permanent adhesives or holes. Trace the route you want the cables to take, making sure to account for any corners or architectural quirks that might disrupt the clean aesthetic you’re aiming for.
- 2. Next, it’s time for some much-needed decluttering, which I call the “pre-production phase.” Gather all your cables and, if possible, use a bit of velcro tie to group them together into a single, manageable bundle. It is so much easier to manage one thick “trunk” of wires than a dozen individual “tentacles” tangling around each other, which is a total nightmare for anyone trying to maintain a professional studio look.
- 3. Now, let’s talk about your choice of containment. If you’re looking for something that practically disappears, I highly recommend picking up some self-adhesive D-Line trunking. It’s a sleek, semi-circular profile that mimics the shape of the skirting board itself. Just make sure you wipe the surface of the wood with a bit of isopropyl alcohol first; if there’s any dust or oil, that adhesive is going to fail you halfway through the project.
- 4. Once your trunking is stuck firmly in place, it’s time to feed the wires through. I usually do this by slightly popping the lid of the trunking open—don’t rip it off entirely!—and guiding the cables into the channel. Think of it like threading a lens onto a camera body; you want a smooth, steady movement to avoid snagging or crimping any of those delicate internal copper lines.
- 5. When you hit a corner, don’t try to force a straight piece of plastic to bend. Instead, grab some corner connectors or, if you’re feeling a bit more DIY-adventurous, use a small piece of mitered trunking to create a seamless turn. This is where the “art” part of my job kicks in; a sharp, awkward angle will immediately break the visual flow you’ve worked so hard to create.
- 6. Finally, once everything is tucked away and the lids are snapped shut, give the whole line a once-over to ensure there are no visible gaps. If you’re using a white skirting board and white trunking, it should practically vanish into the shadows. If you see a tiny gap, a quick dab of matching caulk can act as the perfect “post-production” fix to make the installation look like it was part of the original architecture.
Harnessing Self Adhesive Cable Trunking for Seamless Visual Flow
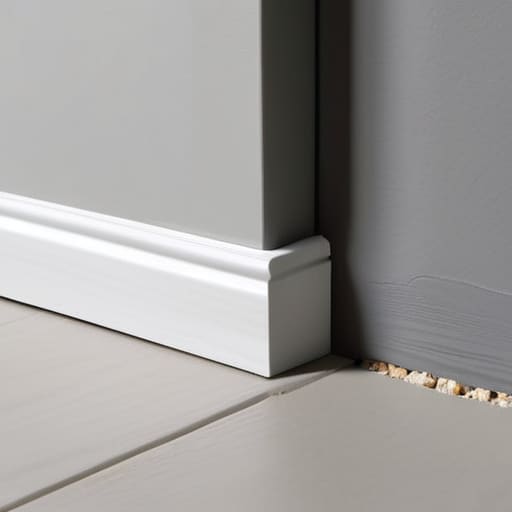
If you’re looking to take things a step further than just simple clips, I highly recommend experimenting with self-adhesive cable trunking. I often use this when I’m setting up my miniature diorama lighting; it’s a lifesaver when you need to move more than just a single power cord. The beauty of trunking is that it creates a clean, architectural line that mimics the very edge of your skirting. Just a quick tip from my workshop: always wipe down the surface with a bit of rubbing alcohol before sticking it on. If there’s any dust or residue, the adhesive will fail, and you’ll end up with a sagging plastic strip that totally breaks the visual immersion of your room.
For those of you who want something even more discreet, look into decorative cord covers that can be painted to match your wall color exactly. It’s all about maintaining the integrity of your space’s lines. When I’m working on a tech-infused setup, I don’t want a black cable cutting through a white wall like a scar. By choosing covers that blend into the background, you aren’t just hiding mess—you’re actually enhancing the intentionality of your design.
High Resolution Communication Tips for Distant Friends
Think of your friendship like a high-end sensor; if you don’t clear out the digital noise, the whole image starts to lose its clarity. When it comes to maintaining long distance friendships, it’s easy to fall into the trap of “low-res” check-ins—those quick, superficial texts that don’t really capture the depth of who you are anymore. To keep the connection sharp, you need to prioritize video calls that allow for real-time, high-fidelity interaction. Instead of just asking “how are you?”, try sharing a photo of something weird you saw today or a quick video snippet of a new project you’re tinkering with. It’s about adding texture to your conversations so the bond doesn’t feel flat.
If you’re looking for more intentional activities for long distance friends, why not try a synchronized digital experience? I love setting up a “virtual watch party” or even playing a low-latency co-op game together. It’s essentially like building a shared diorama in real-time; you’re creating a miniature, digital space where you can exist together despite the physical miles. By finding these shared digital rhythms, you aren’t just surviving the distance—you’re actively reframing your connection through a new, tech-infused lens.
Digital Bonding for Friends Through Shared Virtual Spaces
Sometimes, a simple text thread just doesn’t capture the depth of a real connection; it’s like trying to view a stunning landscape through a low-res thumbnail. To truly bridge the gap, we need to inhabit the same digital “room.” I’ve found that setting up dedicated virtual spaces—whether it’s a private Discord server or a shared digital scrapbooking board—can be a game-changer for digital bonding for friends. It creates a persistent environment where you aren’t just sending messages, but actually existing together in a shared context.
If you’re looking for more active activities for long distance friends, try hosting a “co-working” session via video call. It sounds a bit nerdy, but just having the camera on while you both tinker with your respective projects—me working on a new diorama or you catching up on emails—mimics the cozy, low-pressure vibe of a coffee shop. It’s about moving past the “interview style” catch-ups and finding ways to share the quiet moments of your daily lives, making the distance feel a little less like a void and more like a shared journey.
The Precision of Cable Clips for Skirting Boards and Concealing Electrical
While trunking is my go-to for a completely polished look, sometimes you need something a bit more surgical. If you’re working with thinner wires—like the power cords for my vintage-inspired desk lamps—cable clips for skirting boards are absolute lifesavers. I like to think of them as the “micro-adjustments” of studio setup; they allow you to pin a wire directly into the crevice where the wall meets the floor. The trick is to avoid the urge to space them too far apart. If you want that professional, high-end aesthetic, place them at regular intervals to ensure the cable follows the exact contour of the wood without any unsightly sagging.
For those of us who are obsessed with the fine details, I often look for clips that match the texture of my home’s trim. If you’re dealing with thicker lines, concealing electrical cables becomes a bit more of a puzzle. Instead of just slapping them on, try to tuck them into the shadow line of the molding. It’s all about using light and shadow to your advantage, much like how I frame a shot in a diorama, ensuring the hardware disappears into the visual landscape of the room.
The Finisher’s Toolkit: 5 Pro-Tips for a Polished Visual Flow
- Map your route before you stick anything—I always grab a piece of chalk or a light pencil to trace the path along the skirting first, ensuring I don’t end up with a jagged, zig-zagging mess that breaks the visual line.
- Respect the “Natural Shadows”—try to position your cables or trunking in the tiny crevice where the skirting meets the floor or the wall; hiding them in those natural shadow lines makes them much harder for the eye to catch.
- Color-match your hardware to your aesthetic—if you’re using clips or trunking, don’t just settle for “standard white” if your skirting is a dark oak; finding a shade that mimics your trim makes the tech disappear into the architecture.
- Avoid the “Spaghetti Junction” at the corners—when you hit a corner, don’t just bend the cable sharply; use a small 90-degree connector or a slightly longer piece of trunking to create a smooth, intentional curve that looks like part of the room’s design.
- Tension is your enemy—never pull a cable tight like a guitar string; leave just a tiny bit of “breathing room” or slack so that if the house shifts slightly or a vacuum cleaner bumps it, the connection doesn’t snap or pull the adhesive off your wall.
The Final Frame: Achieving Visual Harmony
At the end of the day, whether you’ve opted for the sleek, modern look of self-adhesive trunking or the surgical precision of individual cable clips, the goal remains the same: eliminating visual noise. We’ve walked through the process of transforming those chaotic, tangled webs into something that actually respects the architecture of your room. By choosing the right method for your specific skirting board style, you aren’t just hiding wires; you are mastering the art of the invisible connection. Remember to take your time with the alignment—much like setting up a complex diorama, it’s those tiny, meticulous details that ultimately determine if the final composition feels intentional or just messy.
As I often tell my friends when we’re tinkering with new gear, the technology we use should never overshadow the space it lives in. Your setup is the stage for your creativity, and a cluttered floor is nothing more than a distraction from your true visual narrative. Once those cables are tucked away and the lines are clean, you’ll find that your environment feels more expansive and focused. So, grab your tools, find that perfect line along the skirting, and reclaim your space. After all, when the technical clutter vanishes, you finally leave room for the pure magic of storytelling to take center stage.