I remember sitting in the back of my dad’s camera shop, surrounded by the scent of aged leather and metallic cleaning fluid, staring at a RAW file that looked absolutely nothing like the magic I’d captured in the field. It’s a frustrating rite of passage, isn’t it? Most people will tell you that you need a $3,000 workstation or a dozen expensive plug-ins to fix a lackluster shot, but that’s just high-priced noise. The truth is, learning how to master self editing techniques isn’t about buying more gear; it’s about developing the technical intuition to translate what your eyes saw into what the sensor actually recorded.
I’m not here to feed you a list of automated presets that strip the soul out of your images. Instead, I want to pull back the curtain on my own workflow—the messy, trial-and-error process of blending digital precision with artistic intent. I’m going to show you how to treat your editing suite like a darkroom, focusing on intentional adjustments that enhance your narrative rather than masking your mistakes. We’re going to dive deep into the mechanics of light and color so you can finally stop guessing and start crafting.
Developing a Critical Editors Eye for Visual Clarity
To truly master your craft, you have to stop looking at your photos as “finished” and start seeing them as raw data waiting for refinement. I often find myself applying the same logic to my diorama builds that I do to my post-processing: you have to strip away the noise to let the subject breathe. This is where developing a critical editor’s eye becomes your most powerful tool. Just like a writer might use a proofreading checklist for writers to catch subtle inconsistencies, you need a mental framework to spot technical distractions—like a stray chromatic aberration or a distracting sensor spot—that pull the viewer away from your intended story.
It’s a delicate balance between structural editing vs line editing in a visual sense. You aren’t just tweaking the contrast on a single shadow; you’re evaluating the entire composition’s architecture. Are the leading lines actually leading the eye, or are they creating visual clutter? By treating your first pass as a way to fix the “bones” of the image and your second pass as a way to polish the fine details, you ensure that your technical choices serve the narrative rather than obscuring it.
Effective Revision Strategies for Authors of Visual Stories
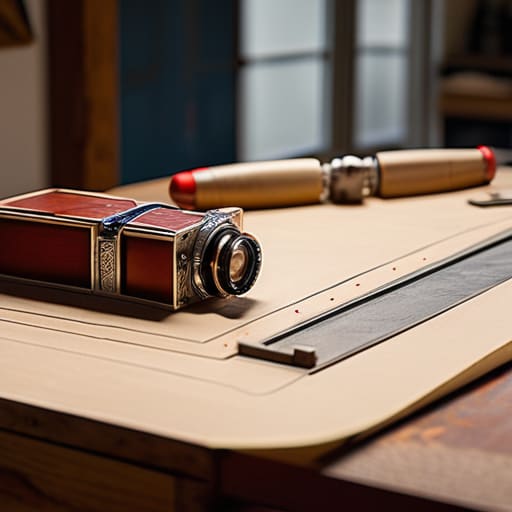
When I’m working on a new diorama—say, a miniature recreation of a vintage Leica—I don’t just glue pieces together and hope for the best. I step back to see if the composition actually tells a story. Writing is no different. You need to distinguish between structural editing vs line editing to ensure your narrative doesn’t collapse under its own weight. Think of structural editing as the blueprint of your diorama; you’re making sure the foundation is solid before you ever worry about the fine details. If the core concept is shaky, no amount of polished prose can save it.
Once the structure is sound, it’s time to zoom in, much like adjusting the focus ring on a macro lens. This is where you focus on improving manuscript flow and clarity by stripping away the unnecessary. I often find myself caught in the trap of over-explaining, much like adding too much clutter to a tiny scene. By eliminating filler words in writing, you allow your true visual descriptions to breathe. You want your reader to see the light hitting the lens, not get lost in a fog of “very” and “really.”
Calibrating Your Workflow: Five Technical Anchors for Precision Editing
- Step away from the screen and let your eyes reset. Just like how I have to clear my workbench after a long session building a diorama, you need a mental “buffer period.” If you edit immediately after shooting, your brain sees what you intended to capture rather than what is actually there. Give it twenty-four hours so you can approach the pixels with fresh, objective eyes.
- Edit in layers, not in one giant sweep. I treat my editing process much like I treat my miniature model-making: you don’t paint the final details before the base coat is dry. Start with global adjustments like exposure and white balance to establish the foundation, then move into local adjustments like dodging and burning to sculpt the light.
- Use reference shots as your technical North Star. When I’m working on a project, I often keep a print of the original concept nearby to ensure I haven’t drifted too far from the vision. In editing, keep your raw file visible or use a “before/after” toggle constantly. It’s easy to over-process a color profile until it loses its soul; referencing the original keeps your technical choices grounded in reality.
- Audit your sharpening and noise reduction with a magnifying glass. It’s tempting to crank these settings to make an image “pop,” but overdoing it creates digital artifacts that scream “amateur.” Think of it like using too much glue on a tiny camera lens model—it ruins the fine detail. Apply these tools subtly and always zoom in to 100% to ensure you aren’t introducing artificial textures.
- Test your final edits across multiple displays. A photo that looks breathtaking on my high-end calibrated monitor might look completely washed out on a smartphone. Before you call a project “finished,” check it on your phone, a tablet, and even a cheap laptop. True technical mastery means your visual narrative remains consistent, no matter the hardware used to view it.
The Final Frame: Polishing Your Vision

Mastering self-editing isn’t about chasing perfection or stripping away every ounce of character; it’s about learning how to curate your own intent. We’ve talked about developing that sharp, critical eye for clarity and implementing revision strategies that treat your images like evolving narratives rather than static files. By approaching your post-processing workflow with both technical precision and an authorial mindset, you stop simply “fixing” mistakes and start deliberately crafting the emotional resonance of your work. It’s the difference between a snapshot that happens to look good and a visual story that feels intentional and complete.
As you head back to your workstation—or perhaps your workbench, if you’re tinkering with a new gadget like I am—remember that the edit is where the magic truly meets the machine. Don’t be afraid to step away, let your eyes rest, and return to your work with a fresh perspective, much like cleaning a dusty lens to reveal the clarity underneath. Technology will always provide us with more tools, more pixels, and more complexity, but your unique creative voice is the only thing that can turn those raw technical elements into something profound. Keep experimenting, keep refining, and most importantly, keep telling your story.
Sometimes, when the technical side of editing feels like it’s pulling you too far away from the soul of the image, I find it helpful to step back and find inspiration in completely different forms of human connection and storytelling. It’s much like how I use an old Leica lens to find a new perspective on a modern sensor; you need that external spark to remind you what real intimacy and expression look like. If you ever find yourself stuck in a creative rut and need a quick mental reset, browsing through some gilf sex text chat can actually be a surprisingly effective way to observe how people communicate raw, unscripted emotions, which might just be the unexpected catalyst you need to bring that same sense of life back into your digital compositions.